Using shapes in Scrapbook MAX! gives you endless creative possibilities! In this inverting shapes tutorial, you’ll learn another great use of shapes for scrapbooking. What does “invert” mean? Instead of cutting out around your paper or photo, you can cut a shape out of your object. How cool is that?
A Step by Step Inverting Shapes Tutorial using Scrapbook MAX! Software
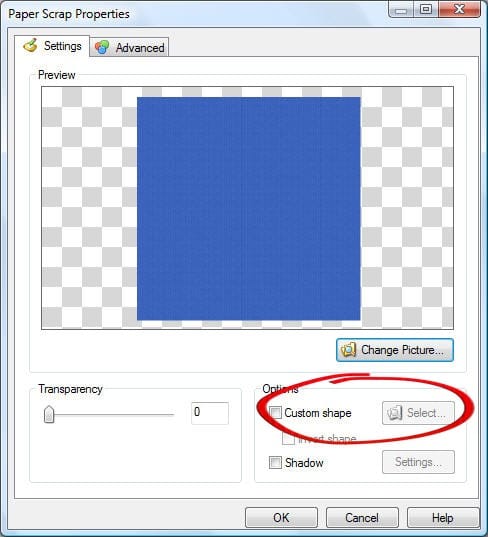
Step 1. Double-click on your photo or embellishment to call up it’s Properties. Choose Custom Shape, and then the Select button to find the shape you want to add.
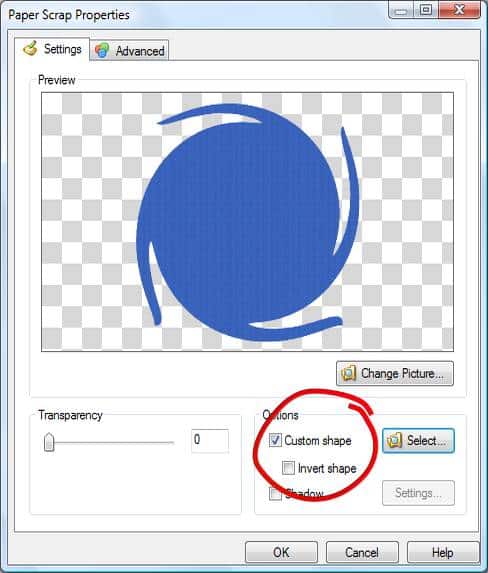
We added a “galaxy” type shape to a blue paper scrap:
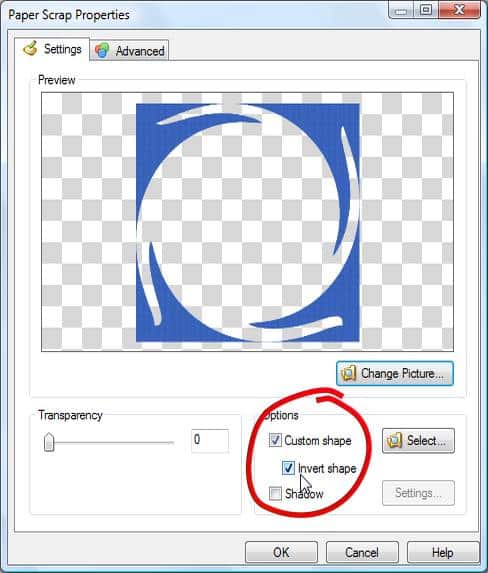
Step 2. To invert the shape – meaning that we’ll be cutting the shape OUT of the paper scrap instead of around it – simply check the Invert Shape box (just below the Custom Shape box). And you’re done!
Inverting shapes is one of those techniques that’s unique to the digital experience. With the same ‘shapes’ tool (a simple button to click with your mouse!), you can apply the shape ‘as is’ or click to invert it right before your eyes. Stamps and fancy cutting tools can only give you one result – and if you don’t like it, you’re stuck with the (hopefully useable) results. It’s just one more reason we love digi! 🙂


