 Tweet
Tweet
This is a template (2 pages) that I made a couple years ago that has been re-saved in 2.0 format.
I use it to keep a miniature portfolio of my layouts. The template is kept very small because there are not a lot of embellishments and it uses less ink than printing a regular photo. It consists solely of two paper scraps, one photo element and a couple of text boxes. I'm putting these in the little soft cover mini photo albums I pick up from (insert name of favorite store here) that hold 36 4x6 pictures.
After I've done one of my standard 8x8 layouts and published it to an image file, I open up my portfolio album in Scrapbook Max! and add a page from the template. I'm using the left side photo template on odd numbered pages and the right on the even numbered pages so the pictures are offset when flipping through the mini photo album.
Double-click on the photo element to add the published image file, change the title, notes and page numbers and it's ready to spit out of my Epson PictureMate printer!
I make notes of who the element designers were and any techniques I might have used that were not "normal". It has helped me a lot as I can refer back to it to remember who a designer was so I can give proper credit and also when I'm trying to remember who designed what.
I thought this might help some of the new folks around here and maybe even some of the old folks.
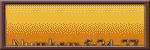
See attached thumbnail and example.
I use it to keep a miniature portfolio of my layouts. The template is kept very small because there are not a lot of embellishments and it uses less ink than printing a regular photo. It consists solely of two paper scraps, one photo element and a couple of text boxes. I'm putting these in the little soft cover mini photo albums I pick up from (insert name of favorite store here) that hold 36 4x6 pictures.
After I've done one of my standard 8x8 layouts and published it to an image file, I open up my portfolio album in Scrapbook Max! and add a page from the template. I'm using the left side photo template on odd numbered pages and the right on the even numbered pages so the pictures are offset when flipping through the mini photo album.
Double-click on the photo element to add the published image file, change the title, notes and page numbers and it's ready to spit out of my Epson PictureMate printer!
I make notes of who the element designers were and any techniques I might have used that were not "normal". It has helped me a lot as I can refer back to it to remember who a designer was so I can give proper credit and also when I'm trying to remember who designed what.
I thought this might help some of the new folks around here and maybe even some of the old folks.
See attached thumbnail and example.


 Dina
Dina


Comment